Halloween Charcuterie board
A festive Halloween charcuterie board is the easiest way to entertain. Everyone loves a good cheese board, and this one is sure to be a hit! Perfect for Halloween parties, family gatherings, or even cozy nights in, this charcuterie board combines spooky aesthetics with delicious flavors. It’s an impressive centerpiece that allows guests to mix and match their favorite treats while enjoying the festive spirit.
Why You’ll Love This Recipe
- Easy to Assemble: No cooking is required, making it a quick option for last-minute gatherings.
- Customizable: You can swap out ingredients based on personal preferences or dietary restrictions.
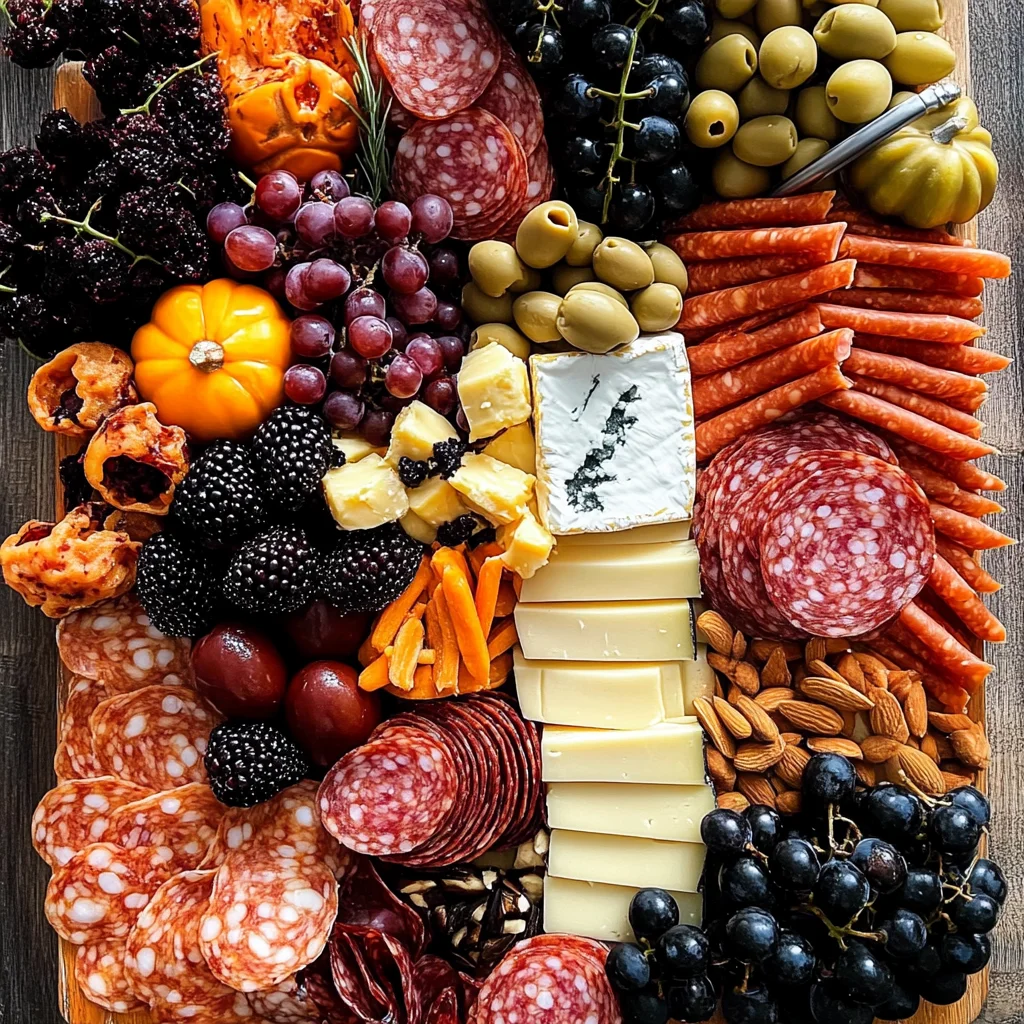
- Visually Stunning: The vibrant colors of fruits and cheeses create an eye-catching display.
- Perfect for Sharing: Ideal for parties, allowing guests to graze at their leisure.
- Delicious Variety: A mix of flavors from savory meats to sweet fruits keeps everyone satisfied.

Tools and Preparation
To make your Halloween charcuterie board, you’ll need a few essential tools and equipment for smooth preparation.
Essential Tools and Equipment
- Large serving board or platter
- Small bowls (for olives, jams, etc.)
- Cheese knife
- Sharp knife (for slicing meats and cheeses)
- Cutting board
Importance of Each Tool
- Large serving board or platter: Provides ample space for arranging all your ingredients beautifully.
- Cheese knife: Allows easy slicing and serving of various cheese textures without crumbling.
- Small bowls: Help organize spreads and small items, keeping the presentation tidy.
Ingredients
A festive Halloween charcuterie board is the easiest way to entertain. Everyone loves a good cheese board, and this one will be a hit!
Ingredients:
– 300 g (10oz) Gorgonzola
– 200 g (7oz) Cheddar (sliced into batons)
– 200 g (7oz) aged Provolone (sliced into thin wedges)
– 100 g (3.5oz) goat’s cheese
– 200 g (7oz) salami
– 200 g (7oz) chorizo
– 150 g (5oz) Prosciutto
– 1 cup almonds
– 2 cups blackberries
– 2 bunches black grapes
– ½ cup tomato jam
– 1 cup cornichons
– 1 cup green olives
– crackers
How to Make Halloween Charcuterie Board
Step 1: Prepare Your Board
Start by grabbing your biggest serving board or platter. Place small bowls on the board for olives, tomato jam, cornichons, or nuts.
Step 2: Arrange the Cheese
Place the bowls on the board, spaced apart. Begin with the cheese; slice firmer varieties into thin wedges and batons for easy serving.
Step 3: Add Soft Cheeses
Keep soft cheeses like goat’s cheese whole. Remember to add a little cheese knife beside each type so guests can easily take a piece.
Step 4: Incorporate the Meats
Fold or roll thinly sliced meats such as salami and prosciutto. Position them between the cheeses for a stunning visual effect.
Step 5: Include Bread and Crackers
Slice bread if desired and place it alongside crackers. Stack crackers on their sides; this makes them easy to grab during mingling.
Step 6: Finish with Fruits and Extras
Fill any remaining spaces with fruits like blackberries and grapes. Add extra items like almonds, pickles, or olives in the bowls for variety.
Enjoy your delightful Halloween charcuterie board!
How to Serve Halloween Charcuterie board
Serving a Halloween charcuterie board can be fun and creative. It’s all about arranging your ingredients in a way that is visually appealing and easy for guests to enjoy. Here are some serving suggestions to make your board stand out.
Use Seasonal Themes
- Pumpkin-shaped cheeses: Look for cheeses that can be molded or cut into pumpkin shapes for a festive look.
- Creepy garnishes: Add plastic spiders or edible googly eyes on fruits to give it a spooky touch.
Create Color Contrasts
- Bright fruits: Use colorful fruits like blackberries and grapes to contrast with the rich colors of the meats and cheeses.
- Dark-colored crackers: Include black or charcoal-infused crackers for an eerie effect.
Incorporate Fun Utensils
- Cheese knives: Provide small cheese knives for each type of cheese, making it easy for guests to serve themselves.
- Themed toothpicks: Use toothpicks with Halloween decorations like bats or ghosts for skewer items like olives or meats.
Arrange by Flavor Profiles
- Savory with sweet: Group the savory items like meats next to sweeter elements like jams and fruits to create balanced flavor pairings.
- Cheese variety blocks: Place different types of cheese together, encouraging guests to create unique combinations.
How to Perfect Halloween Charcuterie board
To truly impress your guests, consider these tips for perfecting your Halloween charcuterie board. These simple adjustments will enhance both the presentation and taste.
- flavors: Choose bold-flavored cheeses like Gorgonzola or aged Provolone that stand out against milder options.
- Variety in textures: Include a mix of soft, hard, and creamy cheeses along with crunchy nuts and crispy crackers for an exciting experience.
- Spooky presentation: Arrange items in a circular shape resembling a spider web; this adds an artistic flair that captures attention.
- Seasonal touches: Incorporate seasonal herbs such as rosemary or sage for added aroma and decoration.
Best Side Dishes for Halloween Charcuterie board
Pairing side dishes with your Halloween charcuterie board can enhance the overall experience. Here are some excellent choices to complement your spooky spread.
- Witch’s Brew Soup: A creamy pumpkin soup served in small cups can warm up chilly nights.
- Mummy Dogs: Hot dogs wrapped in crescent dough resembling mummies make a fun finger food option.
- Eyeball Pasta Salad: A pasta salad featuring mozzarella balls with olives as eyeballs adds whimsy to your table.
- Ghostly Guacamole: Serve guacamole shaped like ghosts with tortilla chips for an inviting dip option.
- Cauldron Chili: A hearty chili served in mini cauldrons is perfect for those who want something hearty alongside lighter fare.
- Creepy Crudités Platter: Carrots cut into bat shapes alongside other veggies served with hummus keeps things healthy yet themed.
- Graveyard Dirt Cups: Chocolate pudding layered with crushed cookies and gummy worms offers a sweet treat that fits the theme perfectly.
- Spooky Sweet Treats Platter: Include Halloween-themed cookies or cupcakes decorated as monsters or pumpkins for dessert options.
Common Mistakes to Avoid
Creating a Halloween charcuterie board can be fun, but there are common pitfalls to watch out for. Here are some mistakes to avoid for a perfect presentation.
- Ignoring balance: A good charcuterie board needs a balance of flavors and textures. Mix soft and hard cheeses with various meats and fruits for an appealing look.
- Overcrowding the board: While it’s tempting to fill every inch, overcrowding can make it difficult for guests to serve themselves. Leave some space between items for easier access.
- Neglecting seasonal themes: For a festive touch, incorporate Halloween-themed items like mini pumpkins or spider web decorations. This enhances the visual appeal and theme of your board.
- Forgetting utensils: Always provide cheese knives and serving spoons. Guests will appreciate having the right tools to enjoy your delicious spread.
- Not considering dietary restrictions: Make sure to include options that cater to different dietary needs, such as gluten-free crackers or vegan cheeses, so everyone can enjoy your board.
Storage & Reheating Instructions
Refrigerator Storage
-
- Duration: Store your Halloween charcuterie board in the fridge for up to 3 days.
-
- Containers: Use airtight containers or wrap tightly with plastic wrap to keep it fresh.
Freezing Halloween Charcuterie board
-
- Duration: It’s best not to freeze a charcuterie board; however, you can freeze specific items like meats and cheeses separately for later use.
-
- Containers: If freezing, use vacuum-sealed bags or airtight containers.
Reheating Halloween Charcuterie board
- Oven: Preheat at 350°F (175°C) for about 10-15 minutes until warmed through. Avoid overheating as this can change texture.
- Microwave: Use medium power in short bursts (30 seconds) until warm. Be careful not to melt the cheese completely.
- Stovetop: Heat on low in a skillet, stirring gently until warmed through.
Frequently Asked Questions
Here are some common questions about creating the perfect Halloween charcuterie board.
What is a Halloween Charcuterie Board?
A Halloween charcuterie board is a festive platter featuring an assortment of cheeses, meats, fruits, and themed decorations suitable for the holiday.
How do I customize my Halloween Charcuterie Board?
You can customize your board by adding seasonal ingredients like pumpkin spice cheese or using themed cookie cutters for fruits and cheeses.
Can I make a Halloween Charcuterie Board ahead of time?
Yes! You can prepare your board up to 24 hours in advance. Just cover it properly and store it in the refrigerator to maintain freshness.
What should I serve with my Halloween Charcuterie Board?
In addition to cheese and meats, consider serving crackers, nuts, olives, seasonal fruits, and spreads like jams or honey for variety.
How many people does this recipe serve?
This Halloween charcuterie board serves about 12 people, making it perfect for gatherings or parties.
Final Thoughts
A Halloween charcuterie board is an exciting way to entertain guests during the spooky season. Its versatility allows you to mix flavors and customize ingredients based on personal preferences. Don’t hesitate to get creative with your selections and have fun crafting this delightful spread!
Halloween Charcuterie Board

Unleash your creativity this Halloween with a charming charcuterie board that combines spooky aesthetics with delicious flavors. This Halloween charcuterie board is the perfect centerpiece for any festive gathering, allowing guests to indulge in a mix of savory meats, rich cheeses, and enticing fruits. With no cooking required and endless customization options, you can cater to various tastes and dietary preferences. Whether hosting a lively party or enjoying an intimate night in, this visually stunning spread will surely impress your guests, making it a delightful addition to your Halloween celebrations.
- Prep Time: 20 minutes
- Cook Time: None
- Total Time: 0 hours
- Yield: Serves approximately 12 people 1x
- Category: Appetizer
- Method: No cooking required
- Cuisine: Halloween
Ingredients
- 300 g Gorgonzola
- 200 g Cheddar (sliced)
- 200 g aged Provolone (sliced)
- 100 g goat's cheese
- 200 g salami
- 200 g chorizo
- 150 g prosciutto
- 1 cup almonds
- 2 cups blackberries
- 2 bunches black grapes
- ½ cup tomato jam
- 1 cup cornichons
- 1 cup green olives
- Crackers
Instructions
- Begin by selecting a large serving board or platter.
- Arrange small bowls for olives, tomato jam, and cornichons on the board.
- Place the cheese first; slice firmer varieties into wedges and batons.
- Keep soft cheeses whole and add cheese knives for easy serving.
- Roll or fold sliced meats like salami and prosciutto, positioning them between cheeses.
- Include bread or crackers alongside, stacking them for easy access.
- Fill gaps with fruits like blackberries and grapes and add nuts in bowls.
Nutrition
- Serving Size: 1/12 of board (approximately 160g)
- Calories: 380
- Sugar: 5g
- Sodium: 750mg
- Fat: 28g
- Saturated Fat: 10g
- Unsaturated Fat: 16g
- Trans Fat: 0g
- Carbohydrates: 14g
- Fiber: 3g
- Protein: 20g
- Cholesterol: 60mg